Chapter 2-6: (Continued)
Part 12: Burnable Tree Entrance
Now we are going to make a tree you can burn with fire to reveal some stairs. This will end up serving as our first dungeon entrance.
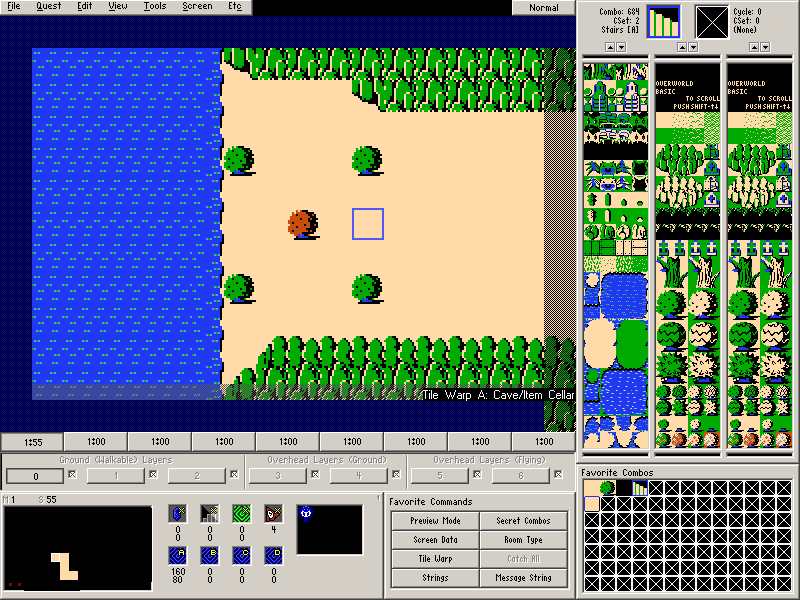
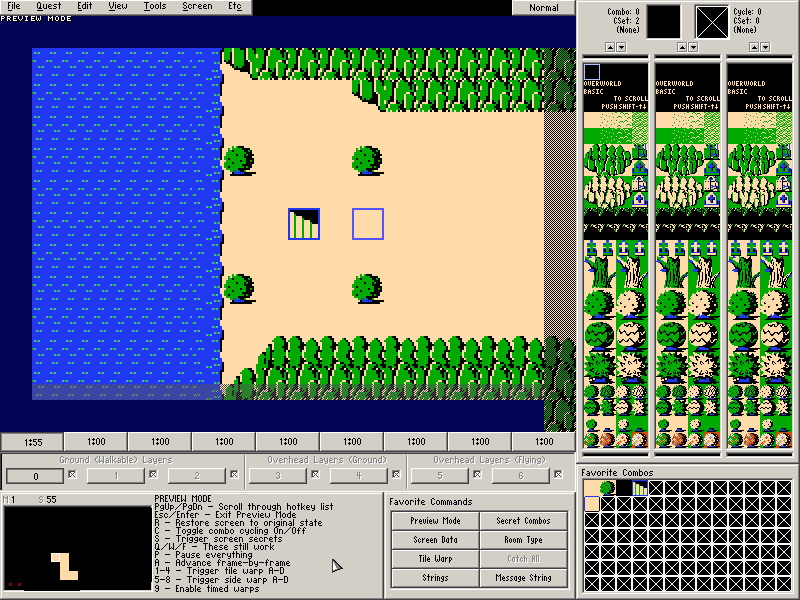
Let's make this screen on Screen 55 (one left of Screen 56):
Because this is going to serve as the entrance to a dungeon, it is not a cave. So the cave setups we have been creating up until now will not apply for this screen. We will be setting up the tile warp that will be used on this screen in the next chapter.
But for now, there are a few things we can still do with this screen.
- Place some enemies on the screen.
- Set Warp Return Square A.
While we are not setting the actual tile warp yet, setting the exit area is still something to do. If you accidentally forget to set up the tile warp for a tile warping combo, it will default to an empty cave.
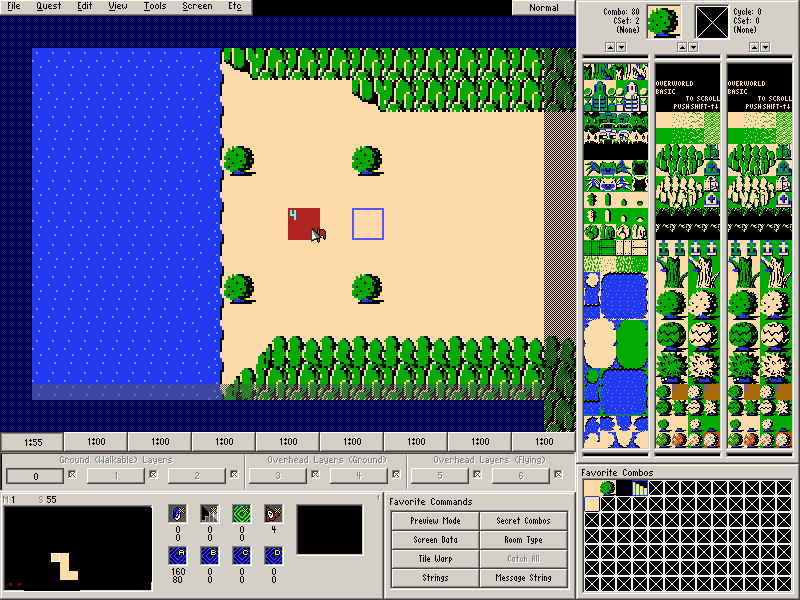
- Place the Burn Flag (Flag #4) on one of the trees.
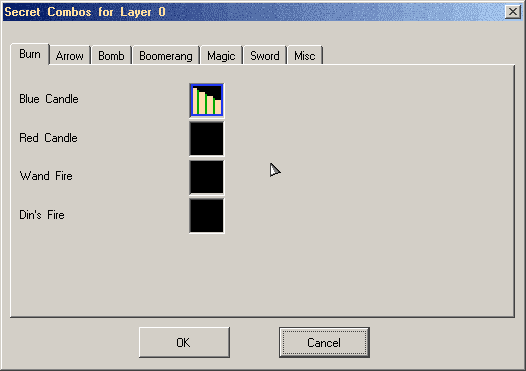
- Set the Secret Combo for Blue Candle under the Burn Tab. (Screen→Secret Combos)
Tile Warp A should now be showing up in the Screen Info.
Part 13: Preview Mode
Normally, you would have to test the combo flag and secret combo we just set in Zelda Classic to see if they worked. However, ZQuest 2.50 has a useful feature that will allow you to see if it is working properly without having to open the quest: Preview Mode.
Preview Mode lets you preview things such as secret flags, warp destinations, and a few other screen objects we have yet to cover.
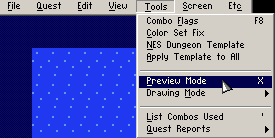
To activate preview mode, go to Tools→Preview Mode (or Press X). A list of keyboard commands will replace the Screen Panel.
- Page Up or Page Down
Scroll through Preview Mode keyboard commands. - Escape or Click a mouse button
Exit preview mode. - R
This will restore the preview to its original state without having to exit and re-enter preview mode. - C
Combo cycling is a concept that won't be covered until much later, so please ignore this for now. - S
This will trigger all of the secrets on the screen, allowing you to preview if Secret Combos and Combo Flags are set up properly. To undo this, press R. - Q
This command also works in the regular view. It allows you to toggle between showing the CSets of every combo on the screen and the combo types (by number) of every combo on the screen. - W
This command also works in the regular view. It shows you the combo solidity on the screen. We will be covering this in greater detail later, but know that Link cannot walk on the pink areas. You can also toggle this with View→Show Walkability. - F
This command also works in the regular view… but we went over that on the last page. It shows the combo flags currently placed on the screen. - P
This will pause and un-pause all animation and actions happening on the screen. - A
This will advance all animations and actions happening on the screen by one frame while the screen is paused. - 1-4
This will let you preview the four tile warps on the screen. Unlike the Follow Tile Warp option from the right click menu, this will not actually take you from the current screen even though the preview will show the new screen. When you exit Preview Mode, you will return to the screen where you entered Preview Mode. Also note that this does not work with Cave/Item Cellar warps. - 5-8
This will let you preview the four side warps on the screen. When you exit Preview Mode, you will return to the screen where you entered Preview Mode. Also note that this does not work with Cave/Item Cellar warps. - 9
This will let you preview any timed warps that are set for the screen. This concept may be covered later on.
For this screen, we want to preview the secret flags. Press S while in Preview Mode and the tree where you placed the burn flag should turn into a staircase.
Once you are finished checking this, Press Escape to exit Preview Mode.
We are pretty much finished with this screen until the next chapter. There we will be tackling our first dungeon and linking this entrance to it.
