Chapter 1-4: (Continued)
Part 14: The Cave Template Screen
Let's take a quick detour before finishing up this cave.
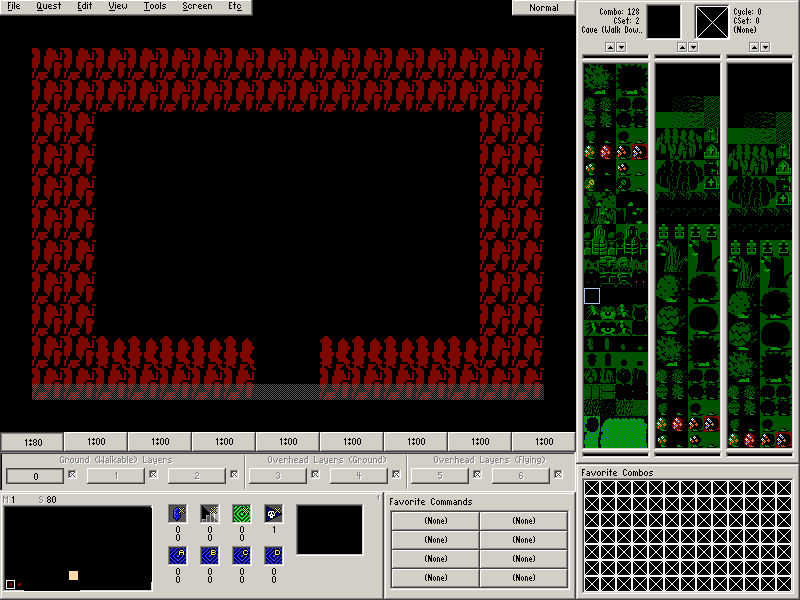
The original Legend of Zelda caves have a somewhat special behavior. The reason we have been setting up all of the information for this cave on the screen with the entrance (Screen 77) rather than inside the cave itself is because all of the special Zelda 1 style caves on a map use the same screen as a template.
Let's look at Screen 80 of the current map, which is where this template is stored and used for the current map only.
It's already set up in this quest, but many custom quest tilesets (and additional maps in this particular quest file) will require you to draw this in if you want to use Zelda 1 style caves for that particular map. It doesn't really require any special settings beyond having a way to enter the screen from the bottom center.
Special Note: The entire 8x row on the map (screens 80-87) is reserved for special template rooms such as the screen 80 cave. Do not try to use these screens for anything other than templates!
Anyway, let's go back to Screen 77 for the next part.
Part 15: Setting up a DMap
In order to use anything that we have drawn on this map in Zelda Classic, we must reference it in something called a DMap. DMaps contain information that tell ZC how to use the maps that we create.
Some things that DMaps include are:
- A map to use.
- The section of the map to use.
- The starting/continuing location on the map.
- The music for ZC to play.
- The colors that ZC will use to draw the screens on the map.
- The level number.
- Various ON/OFF settings that have different behaviors.
But it's okay if you don't understand all of that immediately. That list was mainly to give you a vague idea of what DMaps can do. DMaps are probably the most complex concept in Zelda Classic, so we are not really expecting you to immediately understand it. We will be covering the more complex parts about DMap editing in Chapter 3.
For Chapter 1, we are pretty much only going to change a few settings on the starting DMap of the quest (our Overworld).
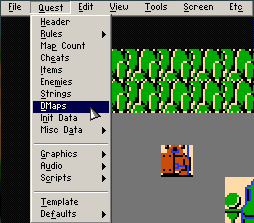
Go to Quest→DMaps
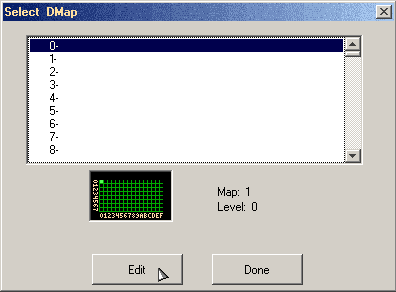
Select DMap #0 and press Edit.
You should be at this dialog:
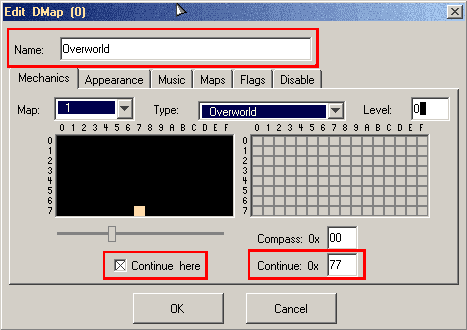
Edit the name field of the DMap to whatever you like. Since this is only used for quickly picking out dmaps in ZQuest, it doesn't really matter what you name it. But you may want to name it “Overworld” since this is going to be our overworld. ![]()
The Map should already be set at 1 and the Type should already be set as Overworld. For the sake of making things easy, the Level should also be set to 0. If not, be sure to change these values.
Continue Here determines if the player will continue on this DMap when saving or continuing. Since this is our overworld, we want this behavior.
Continue is the screen of the DMap that the player will continue on if they are resuming a save from here or they are continuing from a death. This will also determine where the player begins the quest if this is the starting DMap. Set the Continue value to Screen 77 as shown in the screenshot.
Pay careful attention to this next bit of information! It involves a massive departure from previous ZQuest versions.
One of the most common problems introduced to DMaps in ZQuest 2.50 is that people have been unable to figure out the proper DMap settings for Zelda 1 caves. Whereas this behavior used to rely upon the Level Number being set to 0, that is no longer the case.
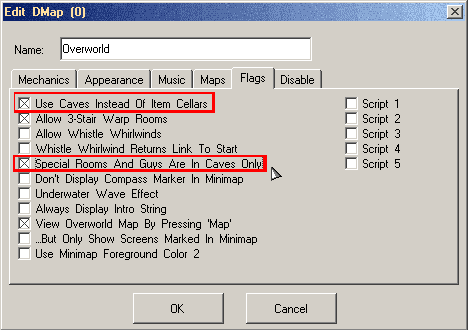
Let's set our Overworld DMap to work with Zelda 1 style caves. Click on the Flags tab.
Make sure to check both Use Caves instead of Item Cellars and Special Rooms and Guys Are In Caves Only. If you do not check both of these settings, your caves will not work properly!
With those settings in place, we are finished editing the DMap for now. Press OK in the Edit DMap dialog and press Done in the Select DMap dialog.
Part 16: Checking the Tile Warp
This is pretty much a confirmation step more than anything since there are no actual settings to change.
Those cave entrance combos (Cave (Walk Down) [A]) we placed are actually one of quite a few combo types that will trigger something known as a tile warp. As the name implies, this is a warp that is initiated by a tile. In most cases, this is done by walking on the tile. So let's take a look at the tile warp editor.
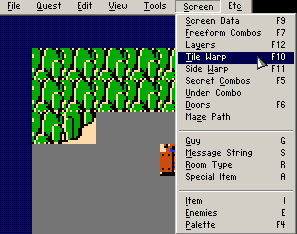
There are two ways to get to the tile warp editor. The first method is the one that will always be accessible to you. Go to Screen→Tile Warp.
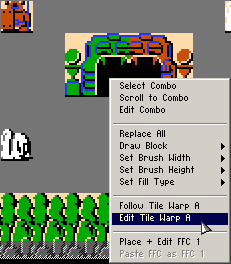
The other method is to right click (Ctrl+Click on the Mac port) on the cave entrance combos and select one of those menu options we neglected until now: Edit Tile Warp A. This will not always be available to you though.
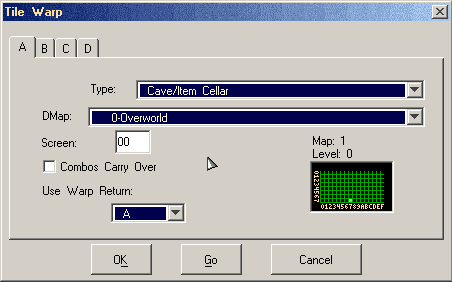
Either way you access it, you should see the next dialog. Make sure it says Tile Warp, not Side Warp!
Each screen can contain up to 4 unique tile warps: A, B, C, and D. This is the main reason we asked you to make sure you were using Cave (Walk Down) [A]. We won't be dealing with multiple tile warps for quite some time, so just editing Tile Warp A (Tab A, obviously) should reduce confusion.
Anyway, the reason we opened this dialog was to confirm that the Type is set to Cave/Item Cellar. With this warp type set, nothing else in this dialog matters. It will always warp you to Screen 80 (the cave template screen) of the current map. Click OK once you are finished confirming the settings with this dialog.
This step seemed kind of useless, but having the proper warp type is extremely important and you need to get into the habit of checking this dialog since we will not always be making caves when we need it.
Part 17: Setting the Cave Exit Point
This, on the other hand, is important to set for most of the warp types (including Cave/Item Cellar).
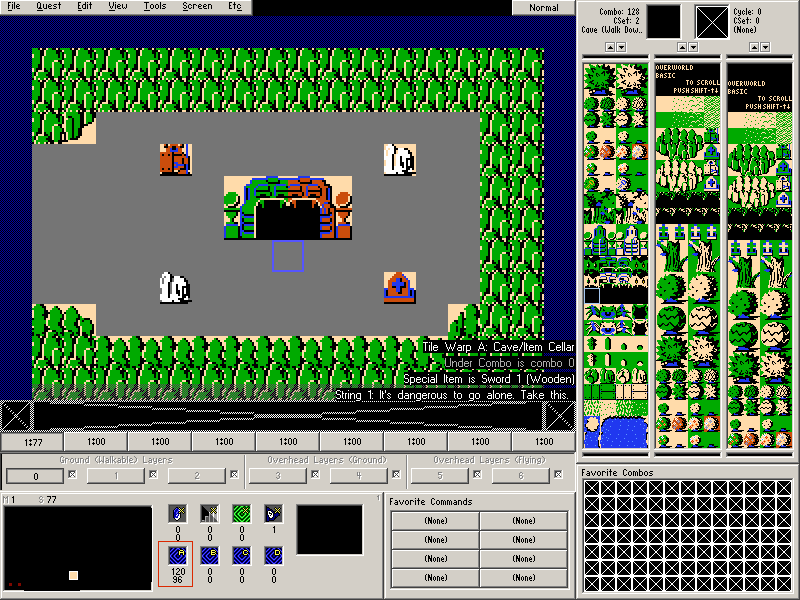
In the Screen Panel (that collection of 8 buttons to the right of the current map view), click the animating Blue Square with the letter A on it. Now click and hold the mouse button somewhere on the drawing screen to drag a blue square around. Try to place it where that blue outline is in the screenshot. If you mess up, you can just follow the same process. The numbers below the blue square A in the Screen Panel will show you the X and Y screen coordinates of where you placed the blue square.
You just placed Warp Return Square A (as the tooltip will tell you if you hover the mouse over it). Warp Return Squares function as warp exit points. Each screen can have up to four different warp exit points that you can go to depending upon a setting you may have noticed in the Tile Warp editor. Unfortunately, Cave/Item Cellar type warps always exit at Warp Return Square A.
Cave Combo Note: If you want the player to appear to walk out of the cave, you must set the warp exit point directly below Cave (Walk Down) combos and directly above Cave (Walk Up) combos. Caves are the only combo types this behavior will work with.
Part 18: Setting the Screen Starting Point
Now we need to set the screen starting point, which is the green square labeled Arrival Square by the tooltip. This determines where Link will start when he starts up the quest.
The process for doing this is identical to the blue Warp Return Squares. Click and drag until the green square outline position matches this:
Because we are using a quest that has the quest rule under Quest→Rules→Combos→Use Warp Return Points Only turned off, this is a necessary additional step. If this quest rule were turned on, everything involving the green square would instead default to Warp Return Square A unless otherwise specified. This includes where Link starts when starting the quest, which is unchangeable in that regard.
There are really only three uses for the Arrival Square when it is available:
- The Start/Continue position on a screen. This can be from starting a quest, continuing a quest, or dying and continuing.
- Entrance/Exit (the warp type) Tile Warps
- Whistle Warps
That's it. Everything else uses Warp Return Points.
With all of that finished, we can technically open this quest in the Zelda Classic player now… but let's go over one or two more things before doing that.
