Chapter 3-5: (Continued)
Part 15: Dark Room
The original Legend of Zelda had dungeon rooms that were dark and required you to use the candle to light them up. We're going to create one such room in this part.
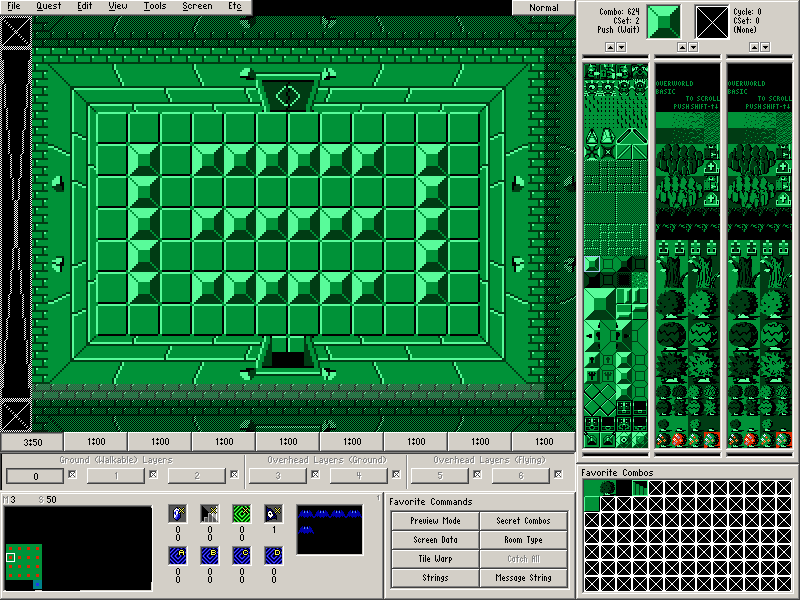
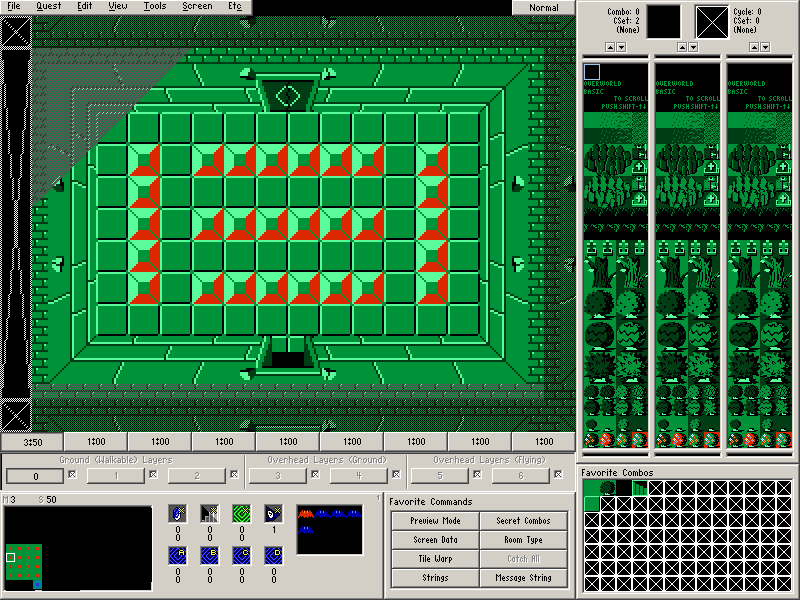
Let's begin by drawing the screen shown above on Map 3→Screen 50.
Door Combo Sets and Placing Doors
- Place the doors. (Screen→Doors or F6).
- There is a Open door to the south and a Shutter to the north.
- Place some enemies on the screen if you want.
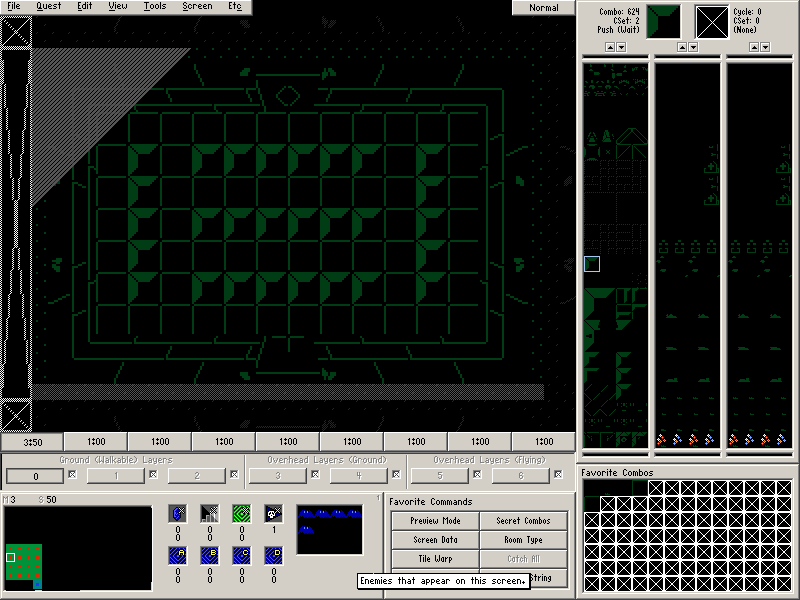
To turn this screen into a Dark Room, Press D and the top left corner of the screen should show a shady corner to indicate that the room is dark.
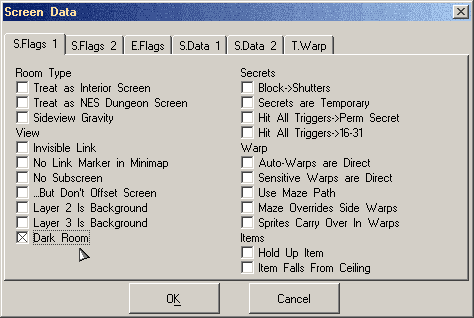
Alternatively, you can take the long route of toggling this by going to Screen→Screen Data. Under the S.Flags 1 tab, check Dark Room.
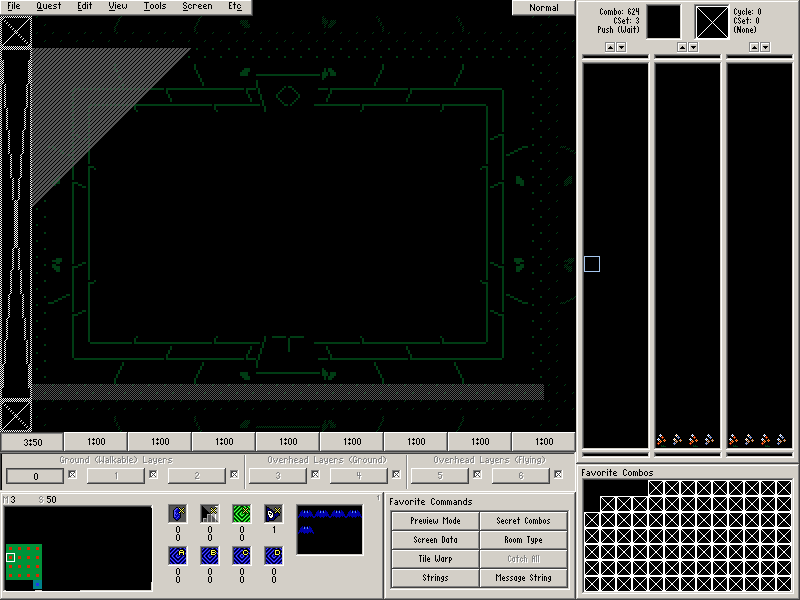
To preview the room and see how it looks with the lights out, Press L. There is no menu option for toggling this, so this is a keyboard button to remember if you use Dark Rooms often.
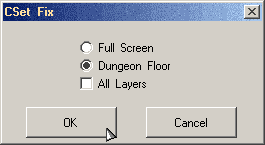
While the room is definitely darker, it's still rather easy to navigate it without using the candle. To fix this, we need to draw the floor using CSet 3. A quick way to fix this is to use Color Set Fix.
Select CSet 3 then go to Tools→Color Set Fix. Make sure Dungeon Floor is selected and press OK.
The blocks in the room should now have a red tint. If you hover the mouse cursor over various combos on the floor, they should show up as CSet 3. The preview for the dark room should also now look better.
Now there is actually a disadvantage to the player leaving the room dark since you can't see everything in it.
Part 16: Tying Push Blocks to Shutters
Zelda 1 had a few rooms where you were required to push a block to cause shutters to open. While we are still on Map 3→Screen 50, let's try that out.
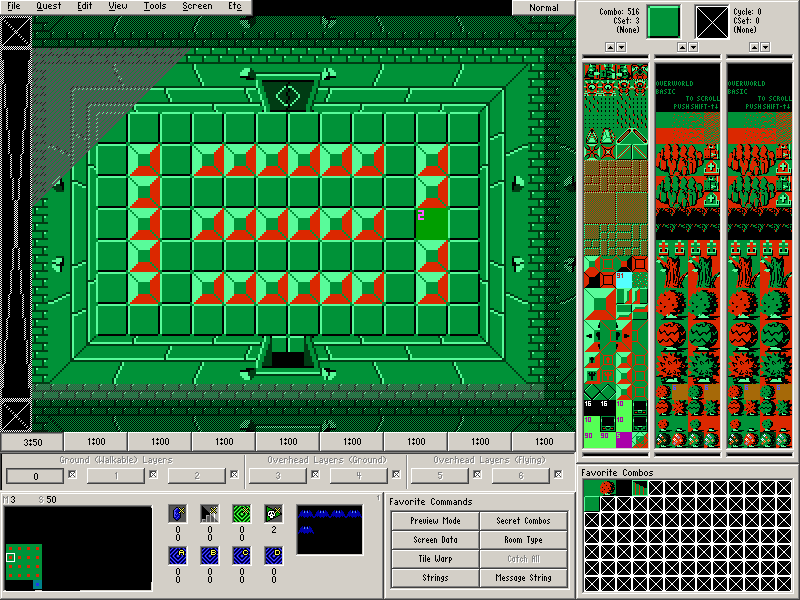
- Place Combo Flag #2 (Push Block (4-Way, Trigger)) on one of the blocks.
Since push blocks use the Under Combo…
Armos Knight and "Under Combo is Combo 0"
- Set the Under Combo (Screen→Under Combo) to the floor combo (Combo #516 CSet 3)
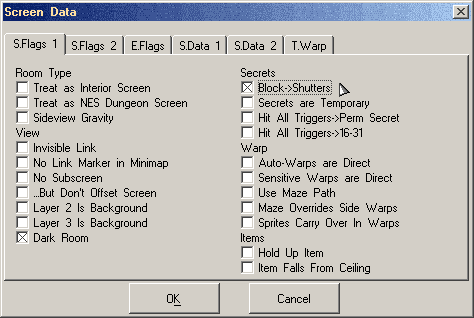
Finally, we need to tell the room to only open the shutter if the push block is pushed. Go to Screen→Screen Data (F9) and go to the S.Flags 1 tab. Select Block→Shutters.
Part 17: Enemy Ringleaders
The blocks on the screen we've been working with for this page are of the combo type Push (Wait). This means that you cannot push them until all enemies in the room are dead. A method to speed this up for the player would be to allow them to kill all of the enemies in the room quickly.
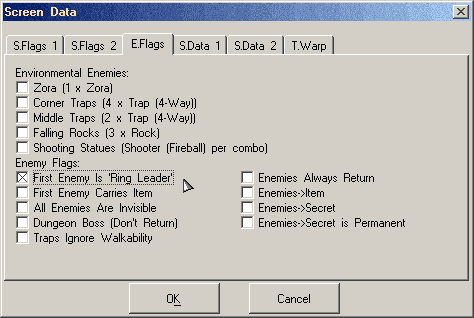
Enemy Ringleaders are one way of speeding things up. If you kill the enemy that is designated as the ring leader, all remaining enemies in the room will instantly die. Let's try that out for Map 3→Screen 50.
Go to Screen→Screen Data (F9) and go to the E.Flags tab. Select First Enemy Is 'Ring Leader'.
