Chapter 5-1: The Final Stretch
In this chapter, we're going to make a whopping total of 4 screens. This will be the “final” dungeon of the quest that will conclude the basic section of the tutorial, but there will probably be additional sections in the future to cover intermediate concepts.
Part 1: Starting another Dungeon
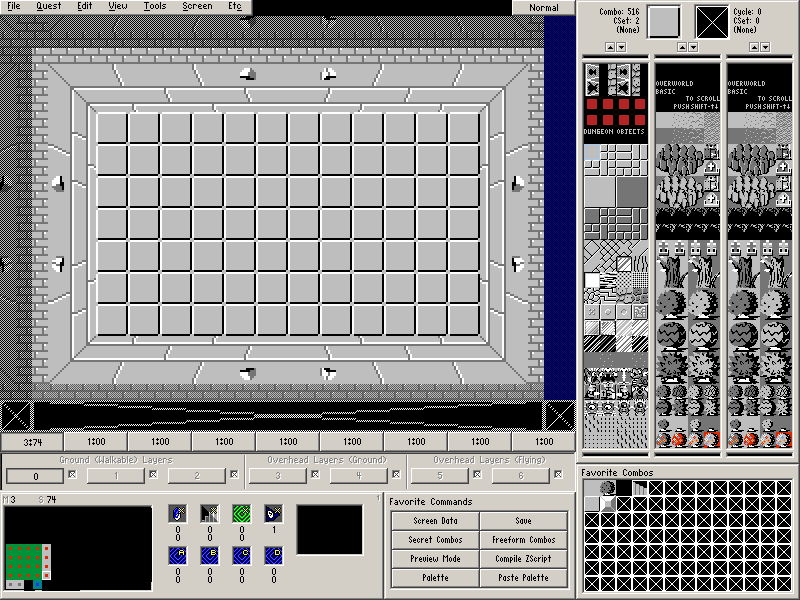
Let's get started by creating some new dungeon screens starting with Map 3→Screen 74 (it should be directly next to the bottom right corner of the previous dungeon).
- Apply an NES Dungeon Template (Tools→NES Dungeon Template) on Map 3→Screen 74 using a typical dungeon floor (the floor used in the previous dungeon).
- Apply the screen palette 009 - Level-9 (Screen→Palette or F4).
Door Combo Sets and Placing Doors
- Fix the Door Combo Set to be Z1 CSet 2. (Screen→Doors or Press D) so that the walls are colored correctly.
Copy/Pasting Additional Dungeon Screens
- Copy Map 3→Screen 74 and paste it to Screens 64, 54, and 44 (the dungeon should be a 1×4 screen rectangle sitting directly next to the previous dungeon).
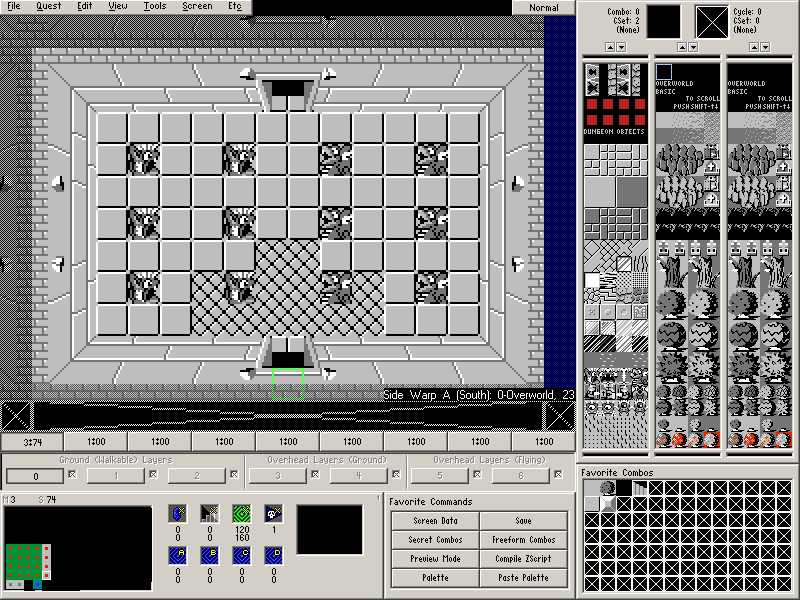
When you are finished with this, the map and each screen should look like this:
Part 2: Final Dungeon DMap
Now that we have the screens in place as a reference, we need to create a DMap for our dungeon.
You can refer to the previous Dungeon DMap we created for reference if anything confuses you since we're going to quickly breeze through this for the most part. There are only two new things to bring up and both of them could have been addressed earlier.
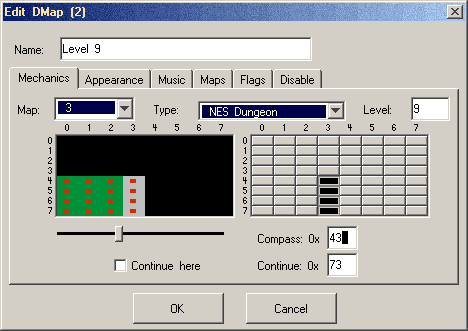
Go to Quest→DMaps and edit DMap 2 (the next empty slot).
Make sure the settings match what is shown above. This includes offsetting the Map to the right by 1.
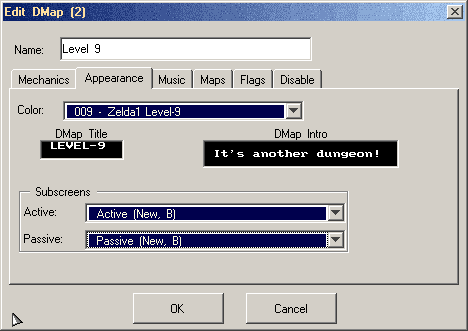
This is where things deviate slightly from the previous procedure. Make sure all the settings match what is shown above. This includes everything under Subscreens.
The DMap Intro is a string that is played on the first entrance to a DMap.
The two entries under Subscreens tell ZC which type of Active Subscreen (the screen that scrolls down for your inventory when you press start) and Passive Subscreen (the display that is shown at the top while you are playing) the DMap will use.
In most pre-2.50 tilesets and any quest that uses the default subscreen structures, this will be split into Magic and No Magic Passive Subscreens and Triforce (usually for overworlds) and Dungeon Map Active Subscreens.
The classic tileset bundled through File→New uses custom subscreens, so that is not the case here. Instead, it has some variations that are wildly different. However, we want to use New, B variations to match the other DMaps we have created so far. If the other DMaps do not match these subscreen settings for some reason, feel free to go back and fix that.
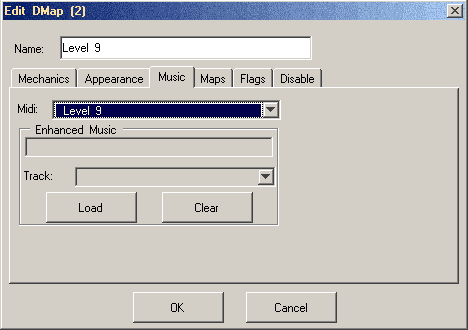
This is rather dull compared to the other settings. Pick the level music as shown above. Once you are finished editing the DMap, Press OK and then leave the DMap editor.
Part 3: Final Dungeon Entrance and Warps
Now that the DMap is out of the way, let's make our entrance screen. Draw this on Map 3→Screen 74… but don't draw the doors manually!
Note: Since this is pretty much the same as Map 3→Screen 70, you can actually copy/paste that here. It will transfer the doors, but you can fix that in the next step.
Door Combo Sets and Placing Doors
- Place the doors. (Screen→Doors or F6).
- There is an Open Door to the north and the south.
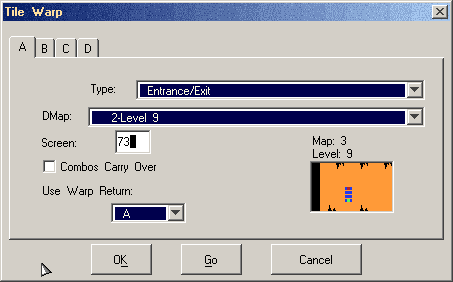
- Go to Map 1→Screen 23 (the overworld entrance) and set a Tile Warp (F10) as shown below.
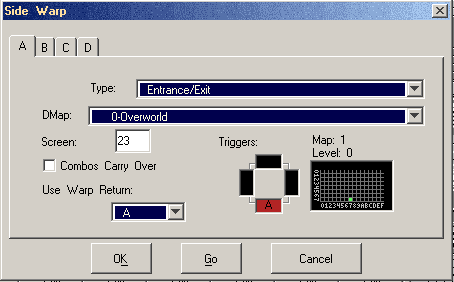
- Go back to Map 3→Screen 74 (the dungeon screen) and set a Side Warp (F11) as shown below.
- Set the green Arrival Square against the bottom of the screen as shown in the screenshot of the screen.
And that's it for this screen.
