This chapter is getting really long, but there just isn't a good place to break it up. But we'll be finished with this dungeon soon enough. We're actually going to plow through all but the last two screens on this page. ![]()
Chapter 3-8: (Continued)
Part 25: The Other Passageway Room
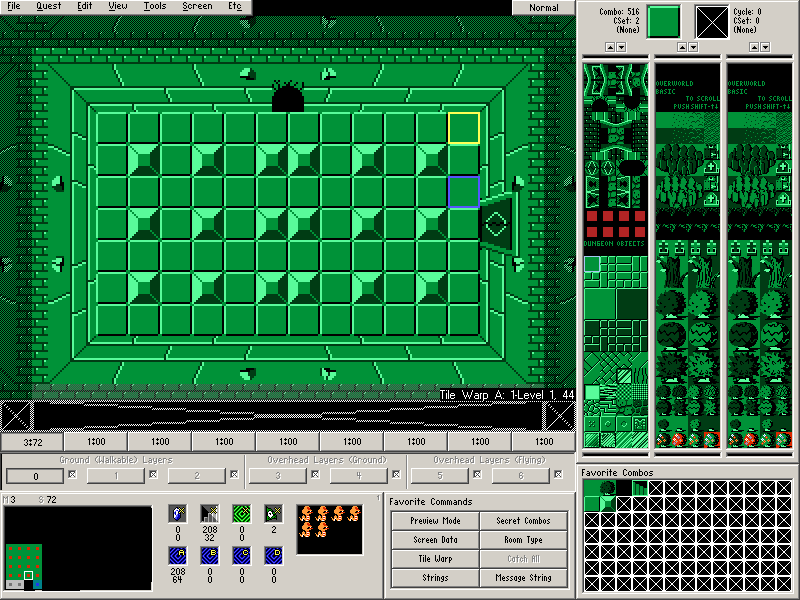
Passageways make more sense if you can traverse them in both directions. We're going to set a connecting passageway at the destination screen for the previous passageway we created.
Draw the following screen on Map 3→Screen 72:
Our setup is going to be nearly identical to the one we used for the other passageway.
Door Combo Sets and Placing Doors
- Place the doors. (Screen→Doors or F6).
- There is a Bombable wall to the north and a shutter to the east.
- Place some enemies on the screen if you want.
- Place Combo Flag #2 (Push Block (4-Way, Trigger)) on one of the blocks.
Armos Knight and "Under Combo is Combo 0"
- Set the Under Combo (Screen→Under Combo) to the floor combo (Combo #516 CSet 2)
- Set Warp Return Square A.
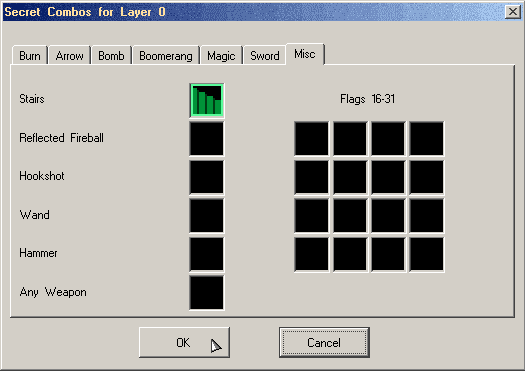
- Set the Secret Combo for Stairs under the Misc Tab to a set of stairs. (Screen→Secret Combos)
- Set the Stairs Secret location.
- Set Tile Warp A to a Passageway with a destination of the dungeon DMap and Screen 44 (the DMap coordinates of the other room with a passageway).
Part 26: Bait for the Next Screen
This is another filler screen. The only purpose it serves is to hand out the Bait item. If you've played the original The Legend of Zelda, you know what is coming next. ![]()
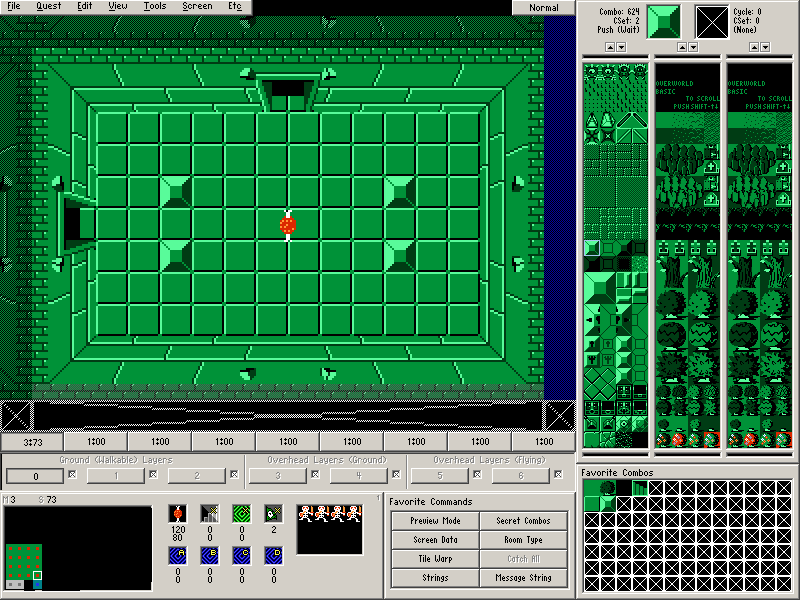
Draw this screen on Map 3→Screen 73:
Door Combo Sets and Placing Doors
- Place the doors. (Screen→Doors or F6).
- There are Open doors to the north and to the west.
- Place some enemies on the screen if you want.
- Place a Bait item on the screen.
- Use some of the optional item screen flags if you like.
Part 27: Feed the Goriya Room
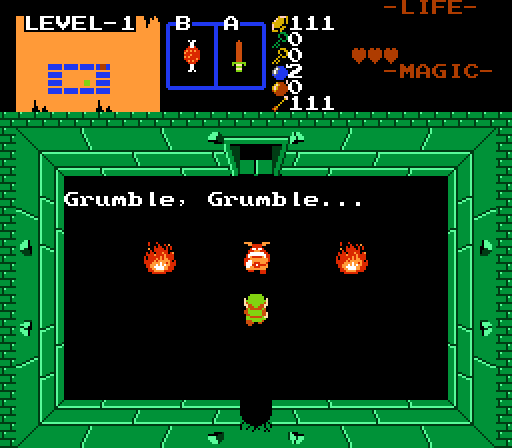
Let's use that random piece of meat that we threw on the floor to satisfy a hungry Guy.
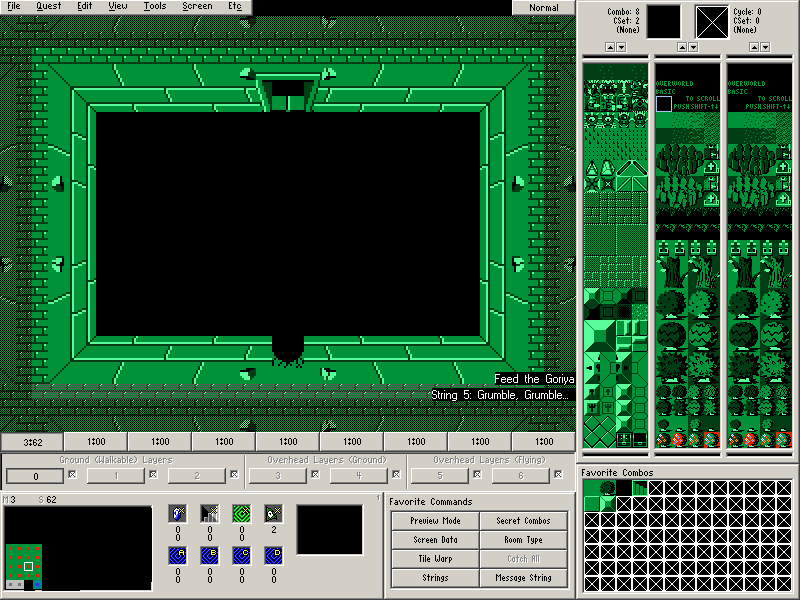
Draw this screen on Map 3→Screen 62.
Since this is the first time we're going to use a Guy inside of a dungeon, it's probably worth reiterating that our dungeon DMap doesn't have the same setup as the overworld. Unlike the overworld, our dungeon is set to make Guys and room types appear directly on the screen you specify them so long as there is a Guy set on the screen.
Beyond that, setting this up is no different from setting up a typical Guy room.
Setting up the Cave Information
- Select a Guy, such as Goriya. (Screen→Guy or G)
Set Screen→Room Type (R) to Feed the Goriya.
- Create a String (Quest→Strings)
- Assign the Message String (Screen→Message String or S)
Here is how the room should look in Zelda Classic:
Part 28: Boss Roar
There were times in Zelda 1 where you could hear the dungeon boss roaring from rooms adjacent to the room it was residing within. We're going to try that out.
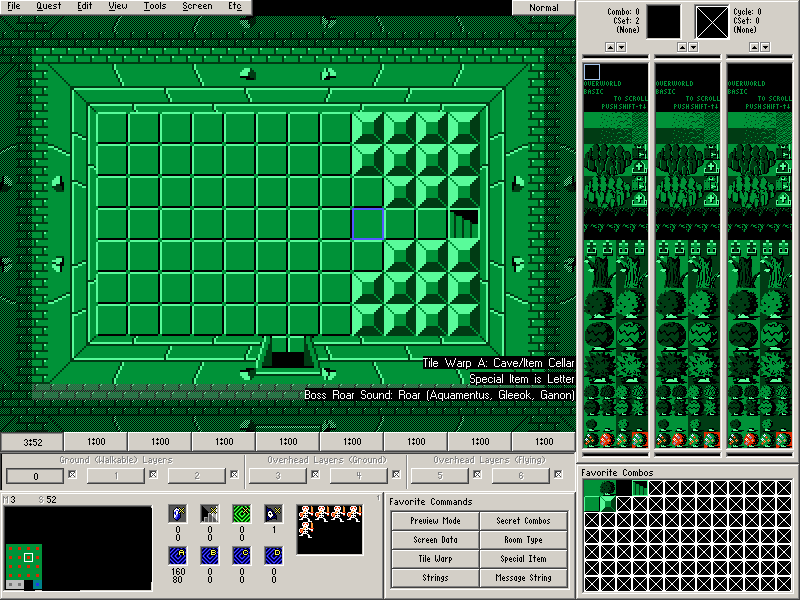
But first, we're going to give out another item that will be used later in the tutorial. You should know the drill by now as far as item cellars are concerned, but let's make sure since this is the last time we're doing it for this dungeon. ![]()
Draw this screen on Map 3→Screen 52
Door Combo Sets and Placing Doors
- Place the doors. (Screen→Doors or F6).
- There is an Open door to the south.
- Place some enemies on the screen if you want.
- Make sure Tile Warp A is Cave/Item Cellar.
- Set Warp Return Square A.
- Set Screen→Room Type (R) as Special Item.
- Set Screen→Special Item (A) as Letter.
Now let's set up the actual boss roar.
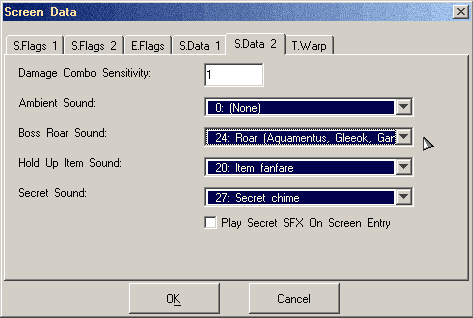
Go to Screen→Screen Data (F9) and click the S.Data 2 tab.
For the Boss Roar Sound, select 24 (the roar effect for Aquamentus). Now when you enter this room, you should be able to hear a boss roar. This will continue to happen until the dungeon boss (which we will set up soon) is killed.
Part 29: Traps
Traps are the moving spikes that try to hit Link when he reaches their “line of sight.” There are two ways to place them in a Zelda Classic quest. The first method is to set them in the pre-arranged Zelda 1 positions of being in the middle of the room or being at the four corners. The second method is to place the traps as enemies then move them around using some special Combo Flags.
But we're only going over the first method in this section of the tutorial.
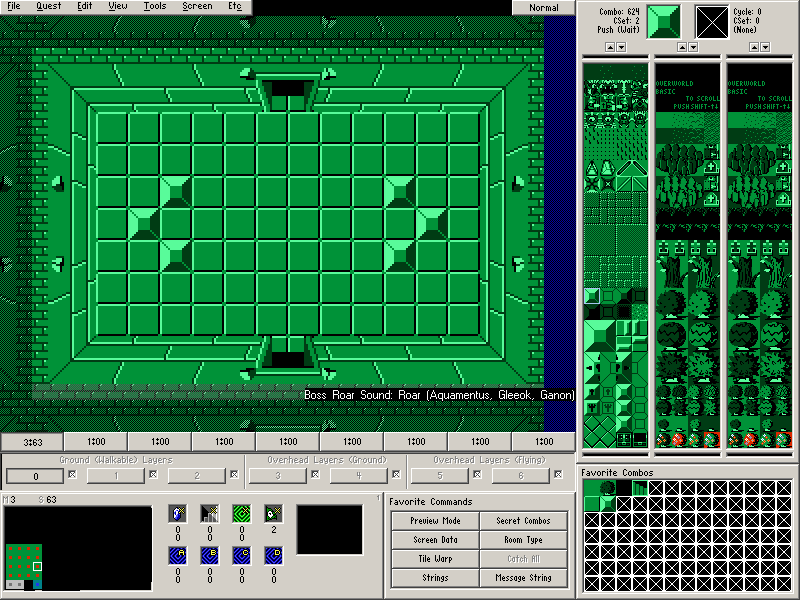
Draw the following screen on Map 3→Screen 63:
Door Combo Sets and Placing Doors
- Place the doors. (Screen→Doors or F6).
- There are Open doors to the north and the south.
- Place some enemies on the screen if you want.
Since this room is also adjacent to the room that will contain the boss, we should also set a Boss Roar here.
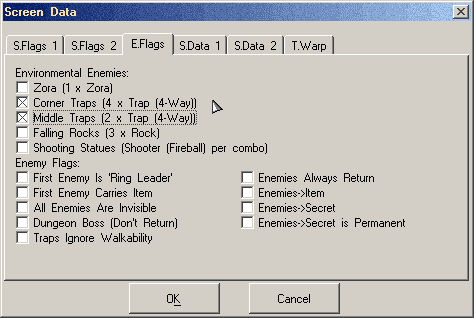
To set traps to appear in this room, go to Screen→Screen Data and click the E.Flags tab. Select Corner Traps if you want traps on the four corners of the room and select Middle Traps if you want two traps in the middle of the room.
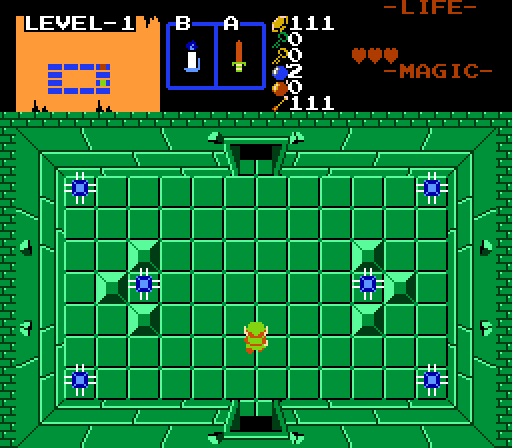
Here is how having both flags checked looks in ZC:
